Figma helps to developers by exporting them easily get CSS directly from design files. Using Dev Mode, developers can view and copy the exact styles (like colors and fonts) from the design. In this guide we will learn how to export tailwind CSS from Figma?
Plugins like Locofy can automatically turn designs into CSS code, saving time and ensuring everything matches the design.
This makes it easier for developers to work with designers and quickly convert designs into working code.
Table of Contents
Top 3 Figma To Code Plugin
- Locofy: Locofy is a powerful Figma plugin that converts your designs into pixel-perfect code, including Tailwind CSS. It supports frameworks like React, Next.js, and Vue, making it a great tool for developers who want to turn Figma designs into production-ready code quickly.
- Anima: Anima is a Figma plugin that helps you export your designs into clean, responsive code with Tailwind CSS. It automatically maps your design styles (like colors and typography) to Tailwind’s utility classes, making the design-to-development process faster and more efficient.
- Figma to Tailwind CSS: This simple plugin helps developers export Tailwind CSS classes directly from Figma designs. By selecting a component or frame, you get the corresponding Tailwind code, allowing you to implement your designs easily in web projects.
There are Many ways to export Tailwind CSS Code from Figma, and Figma Also Provide This feature in His Dev Mode. This feature is for both developers and designers. Both are use very easily.
How We Export CSS From Figma Using Dev Mode
- Fist You have to switch Design Mode To Dev Mode.

- Then select the frame you want CSS for, and the properties will show up on the right .

- And you can simply copy the CSS.
How to Export Tailwind CSS from Figma Using Locofy Plugin?
But if you need a more Accurate way to export complex Figma designs with Tailwind CSS, the Locofy plugin is a fantastic tool. It helps convert your design components into clean, pixel-perfect code with Tailwind CSS classes, making your workflow smoother.
Step 1: Install the Locofy Plugin in Figma

First, you’ll need to install the Locofy plugin in Figma. Here’s how:
- Open your Figma design file.
- Click on the Resources icon in the top toolbar.
- Go to the Plugins tab, search for Locofy, and click Install.
This will add the plugin to your Figma workspace.
Step 2: Launch the Locofy Plugin

Once you’ve installed the plugin:
- Open your Figma file.
- Go to the Plugins menu.
- Select Locofy to open the plugin and get started.
Step 3: Set Up Your Project Settings
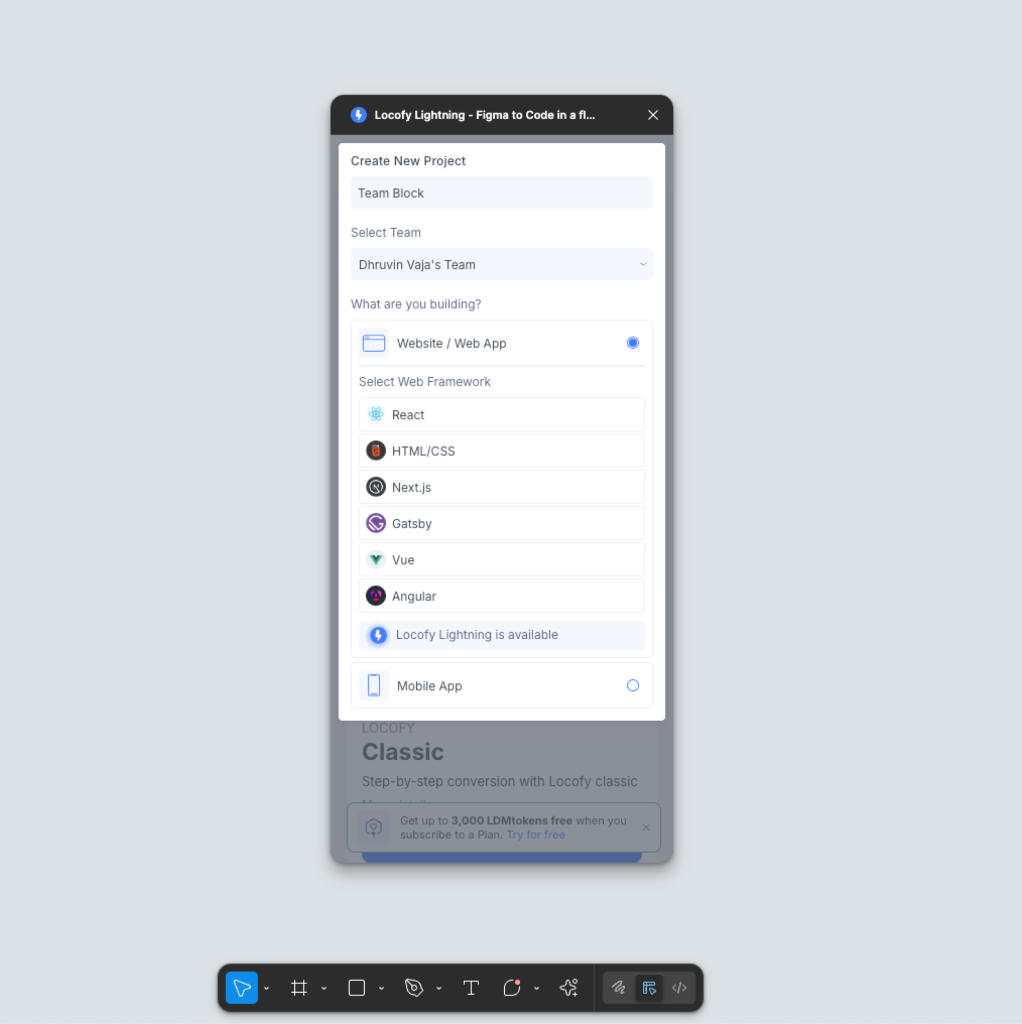
Now, let’s configure your project:
- In the Locofy plugin, click on the project dropdown and select Create New.
- Choose the framework you want to use (e.g., React or Next.js).
- Under the Styling section, pick Tailwind CSS.
- Click Create Project to set it up with Tailwind CSS.
Step 4: Tag Your Design Elements
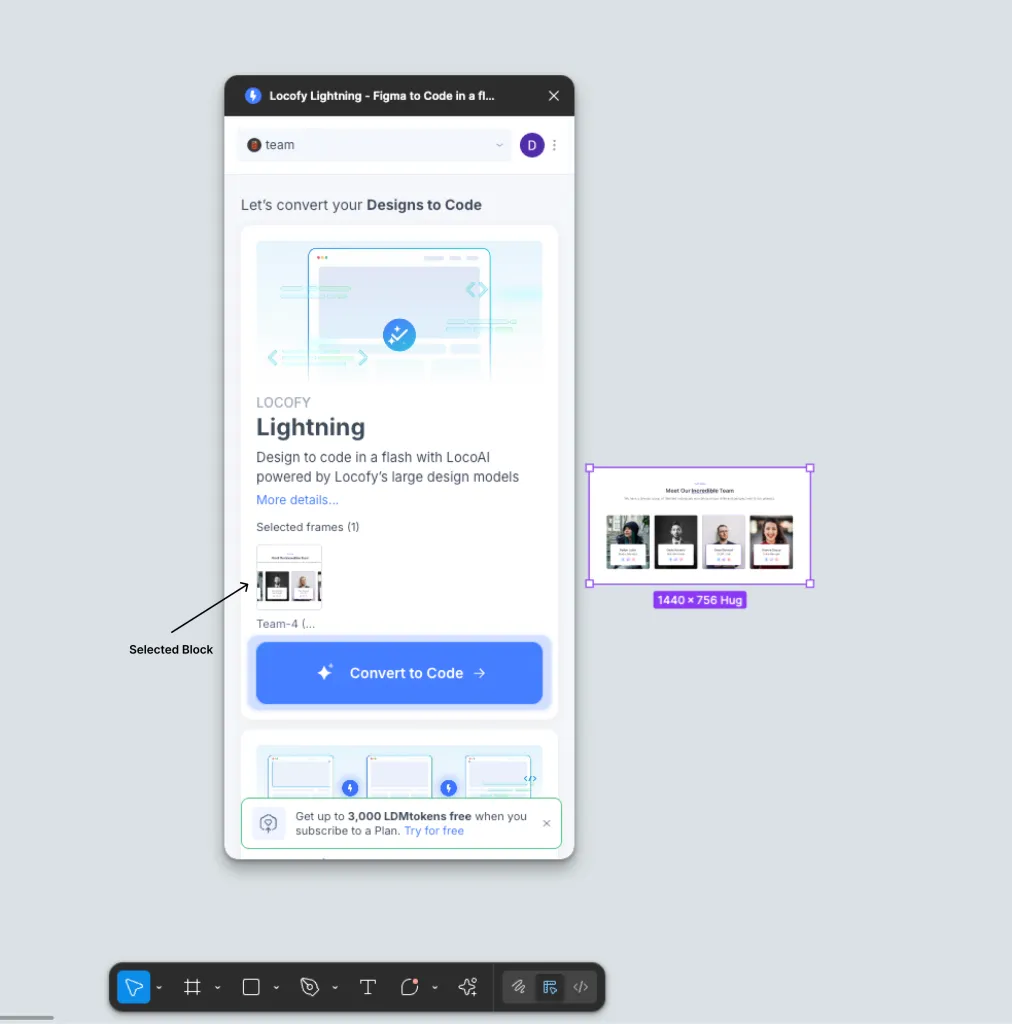
Next, select the elements in your Figma design that you want to export. You can use Locofy’s Auto Tagging feature to automatically assign tags to your design components. Alternatively, you can tag things manually, such as buttons, images, or inputs. Properly tagging these elements ensures that the correct code is generated.
Step 5: Sync to Locofy Builder
After tagging your elements, click Sync to Builder in the plugin. This will open the Locofy Builder in your browser, where you can review the code and make any necessary adjustments.
Step 6: Export Tailwind CSS Code

Once you’re happy with how everything looks, click the Export button. Select Tailwind CSS as your styling option. You can choose to export the code as React components or in HTML file format, depending on your needs. Finally, download the exported code and integrate it into your project.
To Make Things Easier Check FlyonUI Tailwind Figma Component Library

To make your task even easier, use Tailwind figma components by FlyonUI. It comes with 1000+ Tailwind component variants for Figma, 500+ blocks, 20+ templates, 4 themes & more with an intuitive drag-and-drop builder.
Features:
- 1000+ Reusable components and variants
- Fully Responsive for web, tab and mobile
- Design & Dev Consistency
- 500+ Premium Tailwind CSS Blocks
Conclusion
Using the Locofy plugin to export Tailwind CSS from Figma is a quick and efficient way to turn your designs into code. It streamlines the process, saves time, and ensures consistency in your web projects.
Whether you’re using React, Next.js, or HTML, Locofy helps you seamlessly integrate Tailwind CSS and take your design to development without any hassle. Give it a try and make your workflow smoother and faster!
Also, give a try to FlyonUI’s Tailwind Figma Library.